Email Platform Customization
In this article:
FAQs
- Can I customize and edit a CX project that's already collecting responses?
- What format and file size should I use for logos or images?
- Can I remove the "Powered by Delighted" link?
- Can I dynamically update my Intro messages, Subject lines, Product names, and Thank you pages on a per-person basis?
Suggested next article: Distribution Platforms & Sending
Craft engaging Email surveys
Compose high-impact Email surveys with custom branding, targeted questions, and engaging touchpoints. This guide unlocks powerful edits and customizations to make your surveys stand out on any device. Even small changes can have a big impact.
To locate your Email platform's customization options:
- 1
- Choose "Edit and send"
- 2
- Click the "gear" icon → and choose "Edit survey"
- 3
- Select "Configure Reminders" → and follow up on your email sends
-

- Note: Visit our Autopilot article to learn more about the "Adjust Autopilot settings" option.

-
Don’t see a gear icon? You will not see the "gear" icon until you've set up your Email platform. To get started, choose “Set up” on the platform tile and follow the on-screen instructions.


What do you wish to customize and edit?
Seamlessly adjust every detail (1-9) on our user-friendly Email platform customization page. You'll find everything you need to create powerful, personalized survey experiences.

This table unlocks each option marked above. Click the links for step-by-step guides.
| Option
|
Learn how to . . . | |
| 1 | Branding | Modify the Brand/product name, Logo, the Top bar, and Button text color schemes  |
| 2 | Metric question | Revise the initial Metric question — (overriding the default question)  |
| 3 | Email settings | For the Email platform, change the From name, Reply to email, and Email subject line. Send test emails from this panel |
| 4 | Intro message and translation | Alter the Intro message appearing above the initial question.
Also, change the default Language  |
| 5 | Comment page question | Edit the primary Comment question's prompt — thereby changing the open ended default question following the primary Metric question. Note: You can Skip the comment question and go straight to your Additional questions or Thank you page |
| 6 | Additional questions | Add, edit, and reorder up to 10 Additional questions. Note: Additional questions are added separately to each platform  |
| 7 | Thank you page | Change your Thank you page message and add an optional link. Notes: You can use this page for post-survey redirects. You can also Skip the thank you page |
| 8 | Change your CX Metric question | Change your CX Metric question selection — say from NPS to CSAT or CES etc. 
|
| 9 | Preview both Mobile & Desktop | Toggle between Mobile and Desktop previews with a click!  |
1. Branding
The Branding section allows the following changes to your CX project:
- Brand/product name (Required)
- Update logo (PNG, JPG, GIF)
- Top bar color
- Button text color

To make these changes:
- 1
- Click “Branding”
- 2
- Required: Edit the “Brand/product name” → (ex. "Our Fabulous Food")
-
This required text entry automatically changes the From and Subject lines. If you don't like the results, change them later in the Email settings section.
This text also changes a) the question's title and b) the question itself! If you like, replace the title with a logo or image, as explained in the next step. See how to change your entire question in part 2. Metric question.
- 3
- Click “Update logo” → and add an image
-
Change out your logo as often as you like. Upload your image in either a PNG, JPG, or GIF file format. (See What format and file size should I use for logos?)

- 4
- Change the default “Top bar” → and “Button text” colors
-
Change your accent colors by clicking the down arrows and choosing a new color from the palettes.
For more precision, enter your brand’s hex color codes (ex. #EF5F1C).
- 5
- Save your changes!


Brand/product name (required)
Changes to the Brand/product name has three effects:
- 1
- If no logo is added, your brand/product name will also appear at the top of the survey
- 2
- Whatever you enter into the brand/product name box will alter the default question
-
Adding "Our Fabulous Food" will change the default NPS question to, "How likely are you to recommend 'Our Fabulous Food' to a friend?" See how to change your entire question in the Metric question section
-
- 3
- Your Brand/product name will alter your "From" address and the "Subject" line text
- Note: See how to edit your Email addresses and Subject lines in Email settings
Update logo
Upload a logo or another image to appear directly above the survey question — replacing your brand/product name.
-
What format and file size should I use for logos or images?
Delighted accepts PNG, JPG, and GIF image file formats.
Generally, upload an image with the largest file size available. We’ll compress it to fit the Delighted format. (Albeit, if you're running into an issue with the logo not loading, try a smaller file size.)
Avoid uploading an image where any side is less than 300 pixels, or that has excessive white space above or below the image.
Top bar color
To change the color of the survey's top bar, select your color from the color palette or enter a specific hex code. The bar color will be consistent through the entire survey experience — all the way to the Thank you page.

Button text color
To change the color of the text used for the number scale and selection choices, select your color from the color palette or enter a specific hex code.

2. Metric question
Reword your primary Metric question as needed. This will override the default question.

To edit your question:
- 1
- Click “Metric question”
- 2
- Reword the default question → (ex. add "... or family member?")
-

- 3
- Don't forget to Save your changes!

3. Email settings

To edit your Email addresses and Subject line text:
- 1
- Click “Email settings”
- 2
-
Edit the default “Reply to email” address
Enter the Email address where you want replies to the email to be sent. By default, this will be the email address of the Delighted account owner; but you may want it redirected
- 3
- Edit the default “Email subject” line
- 4
- Optional: Click "Send a test email" and see how things work!
4. Intro message and translation

Change the Survey language
Delighted supports translation to dozens of languages. The language setting set here will represent the default language of your survey.
Note: You can always translate the survey dynamically using our Locale special property. Check out this article on translating your survey!

Intro message
Craft a captivating Intro message! Briefly explain how participant feedback directly impacts improvements, set clear expectations (think "quick and easy"), and establish your brand's personality. This sets the stage for a smooth and engaging survey experience.

To change your settings:
- 1
- Click “Intro message and translation”
- 2
- Change your “Survey language” setting
-

- 3
- Edit the default “Intro message”
-


- 4
- Save your changes!
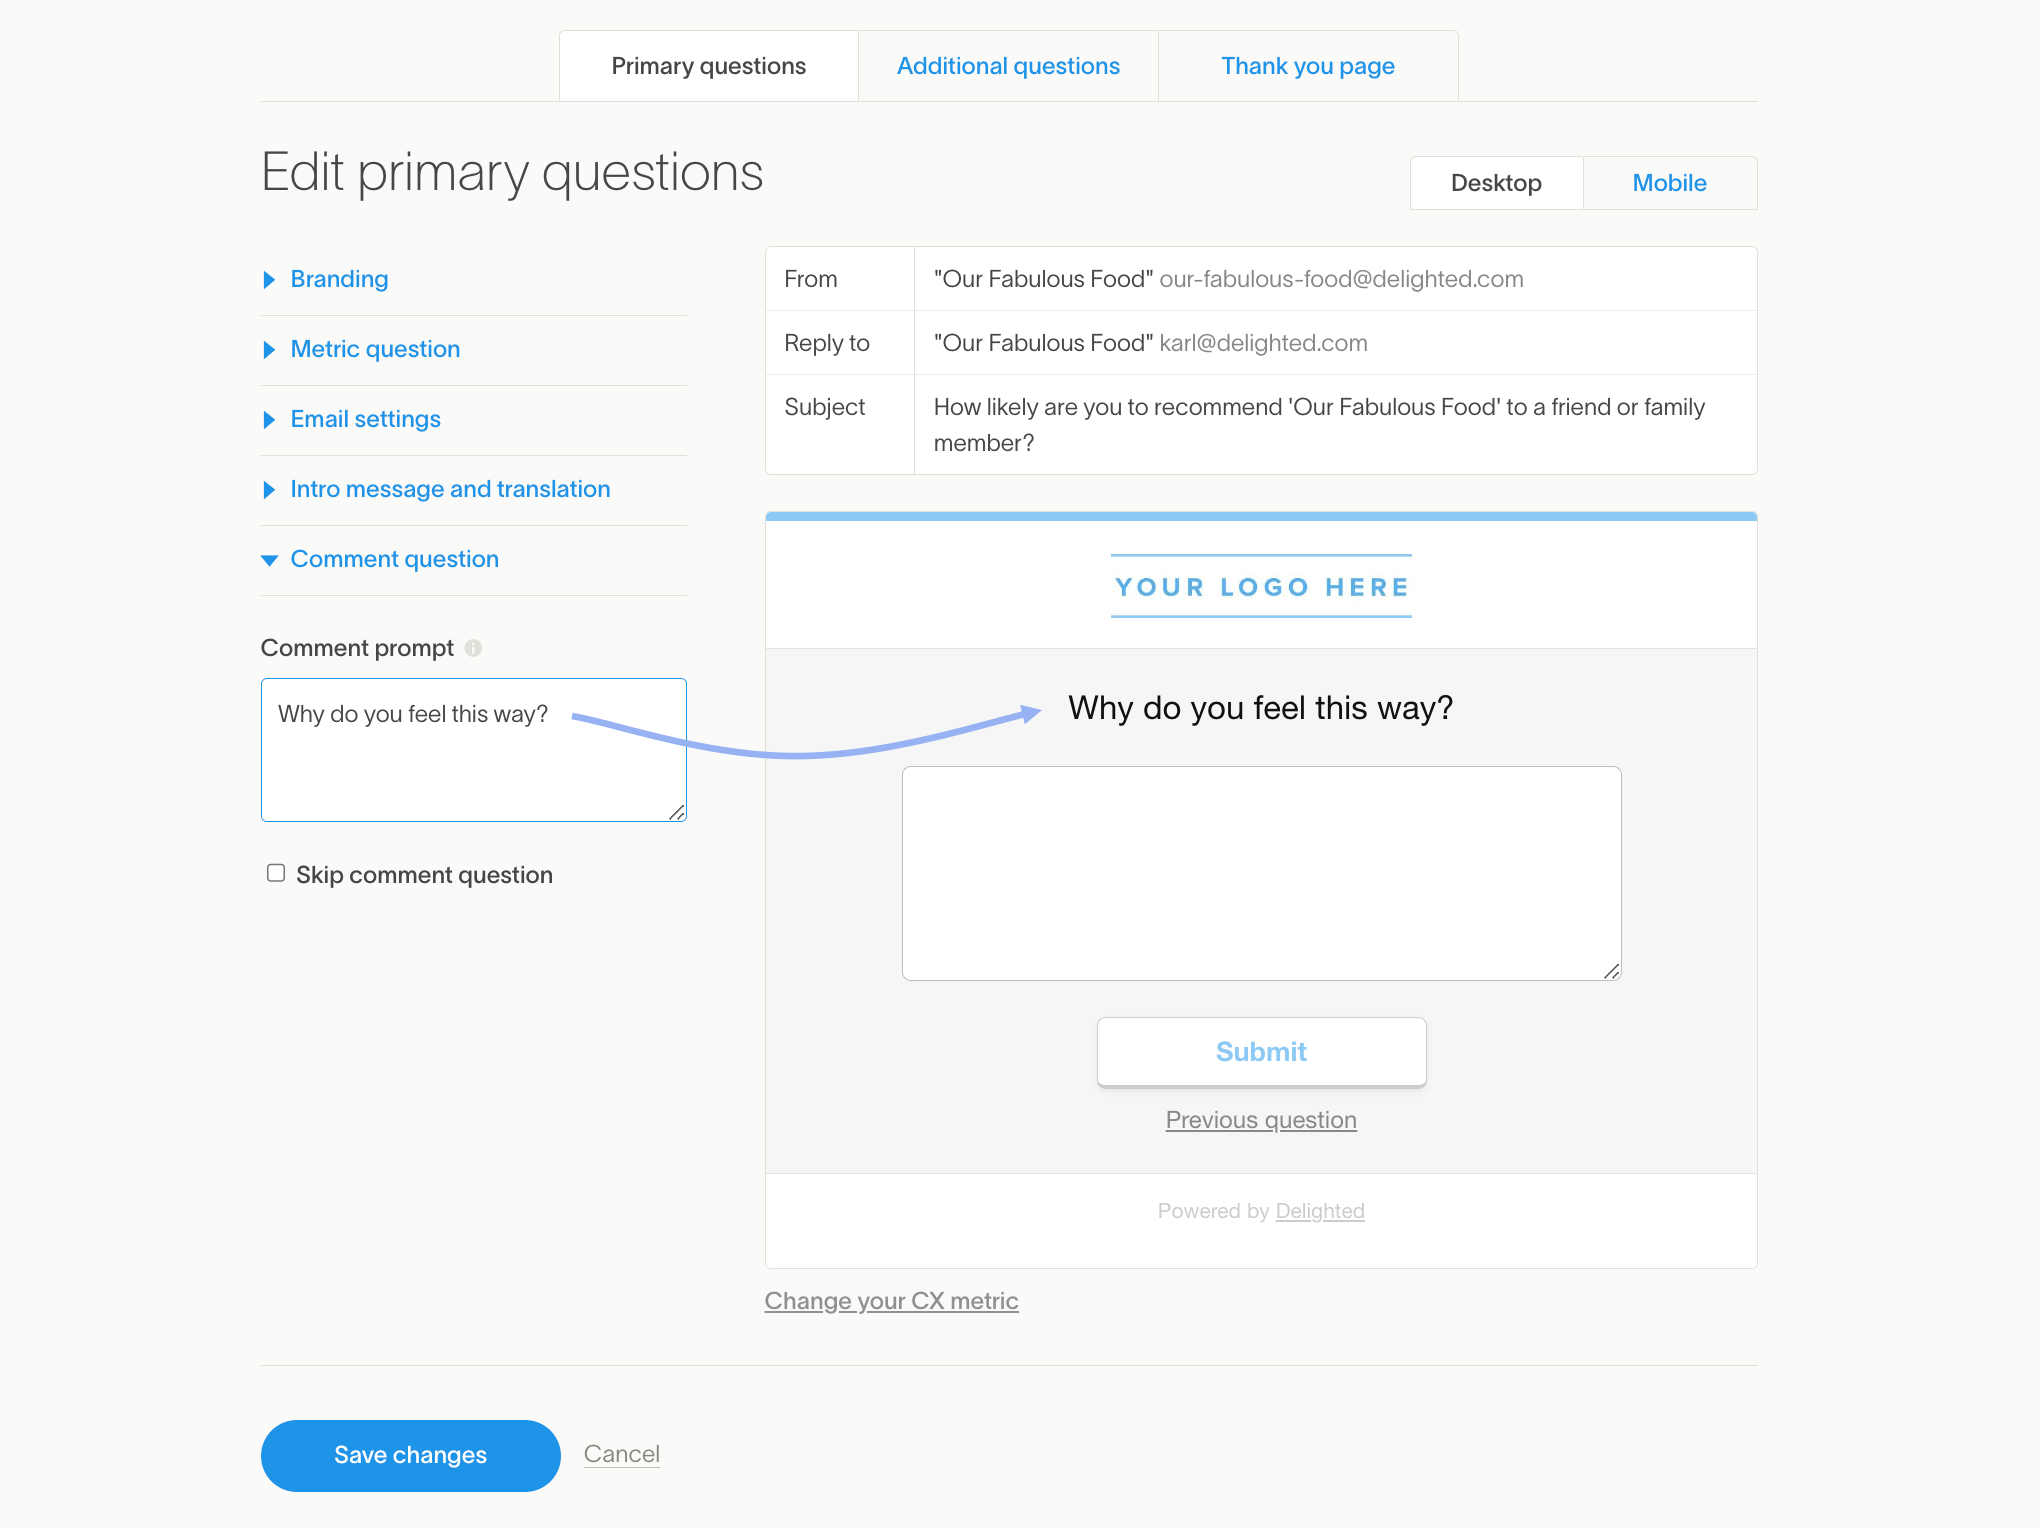
5. Comment page question

Comment prompt variables
Delighted automatically includes an open-ended "Comment" question page immediately following the initial Metric question (ex. NPS, CES, CSAT, etc.) By default it will read, "Tell us a bit more about why you chose X."
You can rewrite the prompt and still dynamically include the score from the prior Metric question — with the variable:
{{ survey_response.score }}.For example, if you wanted the Comment question for a score of 10 to read, "What made your experience a 10?" you'd set the comment prompt to "What made your experience a
{{ survey_response.score }}?"
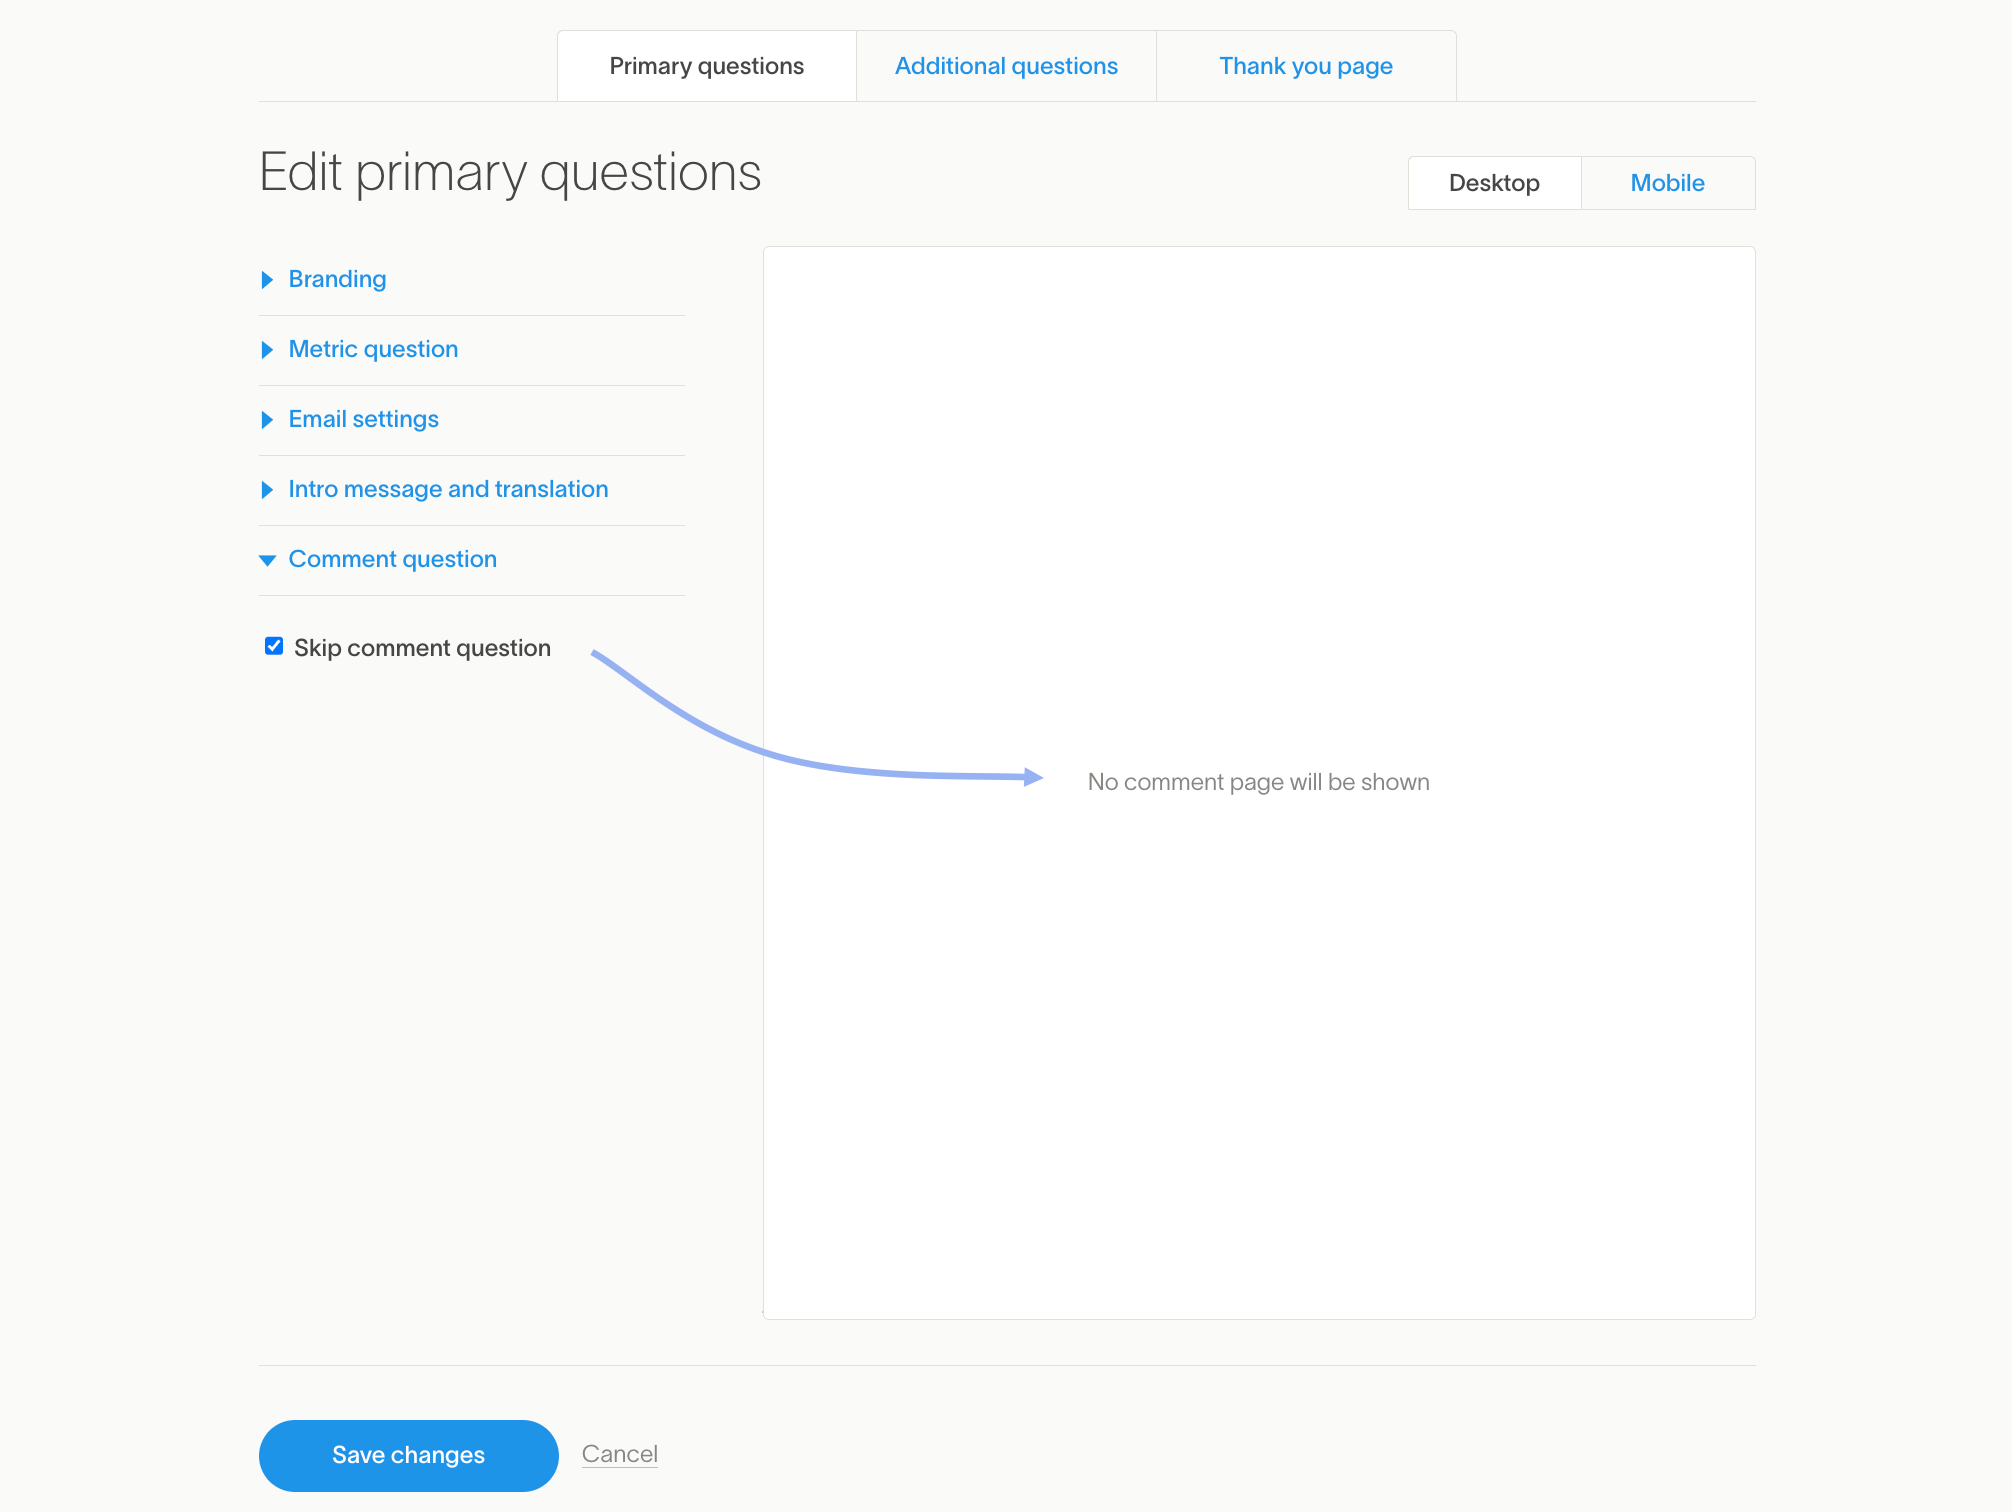
How to Skip the Comment page question
If you click "Skip comment prompt," your respondents will be automatically taken to either your:
Additional questions (if configured) or
Thank You Page (if no Additional questions exist)
-
Can I move the Comment page to follow my Additional questions?
No. However, there is a workaround!
1. Skip the Comment page question as explained above
2. Create your Additional questions
3. Create a "free response" type Additional question and place it anywhere you like — first, last, or in the middle. (See Additional questions for more details.) -
Note: You can also skip the Comment Prompt for specific score types, such as Promoters. To learn more, review our Special Properties page.
To edit your comment page:
6. Additional questions
Click the Additional questions tab to insert up to 10 custom — yet optional — Additional questions to each CX survey platform.

These questions will follow your initial Metric question and Comment question. (Note: Remember, you can Skip the Comment question and go straight to your Additional questions if you find that to be a better strategy.)
-
Ready to explore Additional questions in depth?
Visit our Additional questions article for a comprehensive guide.
7. Thank you page

The Thank you page displays a default message after a recipient takes a survey. The default reads, "Thanks, we really appreciate your feedback."
However, this message may not meet your needs. Plus, there are other very important options — all of which can be altered quickly!
- Deliver the "Same message for everyone"
- Show a Different message" based on the score selected in the primary Metric question
- Add a follow-up "Link URL" either back to your website or to another location
- "Skip" the thank you page altogether
-
Visit our detailed Thank you page article
Since there are so many nuances, we've created a detailed self-Help Center article covering every possible change. Jump to our Thank you page article to learn more.
To edit your Thank you message:
- 1
- Click "Edit and send"
- 2
- Open the "gear" icon on the Email tile → and then choose "Edit survey"
-

- 3
- Make your changes → (ex. Craft separate messages for Promoters, Passives, and Detractors for an NPS Metric question)
-


-
Can I skip the Thank you page or use it to generate referrals?
Yes and yes! Just click "Skip thank you message."

Pop on over to Thank You Pages in this Help Center to learn about the options.

8. Change your CX Metric question
You can change your primary Metric question — as long as you are still in the process of Customizing your survey.
For example, you can change an 11-point NPS Metric to a 5-point CSAT Metric question as suggested in steps 1-6 below.
- Once you send the survey and receive responses, you can't change the Metric.
To change your primary Metric question:
- 1
- Select the "Primary questions" tab
- 2
- Click "Change your CX Metric" → seen at the bottom of your customization preview
-

- 3
- A menacing sounding box will appear alerting you of the consequences! (Don't panic. It just says you'll be starting your surveys' customization over again.)
-
Click "Delete this project → followed by the "Create new" button

- 4
- An even more threatening page will appear! This time with a bright red button, asking, "Are you are serious!" Are you? If so, click "Delete this project"
-

- 5
- As you return to the Platforms page, select a different Metric question and start Branding again. (Now, that wasn't so bad, was it?)
-


9. Preview both Mobile & Desktop
Simply toggle between your "Desktop" and "Mobile" views to see how your survey will appear on different devices.

Can I edit a CX project that's already collecting responses?
Yes! Of course.
While you can't change your primary Metric question after you've sent and shared your survey (see Change your CX metric question) you can still change your Branding, fix spelling errors, add Additional questions, change the Thank you message, and a host of other things.
To make changes to an existing project:
- 1
- Click "Edit and send"
- 2
- Email: Open the "gear" icon for Email → and then choose "Edit survey"
-
- 3
- Choose any of the editing options → and edit away!
How can I send a test email?
Send a test email to yourself or to a teammate. Test emails mimic the entire CX survey experience — but responses will not be recorded on the CX Dashboard.

To send a test email:
- 1
- Click "Edit and send"
- 2
- Open the "gear" icon → in your Email platform tile
- 3
- Choose "Edit settings"
- 4
- Scroll down to the "Send a test email" → and enter an address!
- 5
- Click "Send"
Can I remove the "Powered by Delighted" link?
Not currently.
We include the "Powered By Delighted" link as a trustmark, allowing your respondents to learn more about our survey platform and the security and privacy policies associated with the Delighted brand.
Can I dynamically update Intro messages, Subject lines, Product names, and Thank you pages on a per-person basis?
Yes.
You can apply Special Properties to personalize your surveys — fine-tuning the content to keep it super relevant to each respondent. To whet your appetite, here is a short list of the Special Properties you can apply to an Email survey:
| Question Product Name | Updates the brand/product name in the score question (ex. “How likely are you to recommend [question product name] to a friend?” for NPS) |
| Delighted Intro Message | Updates the entire intro message in your survey |
| Delighted Email Subject | Updates the entire subject line for your email |
| Comment Page Prompt | Updates the prompt / header on the Comment Page |
| Comment Page Skip | Skips the Comment Page |
| Locale | Updates the translation of your survey |
- Jump to the Special Properties page in this Help Center to learn the details.
Special Properties for Thank you pages
The Thank you page can be updated for all respondents, or based on the score group. Here are the options:
| Thank You Page Message | Updates the message on the Thank you page |
| Thank You Page Link URL | Updates the URL on the Thank you page will link to |
| Thank You Page Link URL Text | Updates the text used for the hyperlink on the Thank you page |
| Thank You Page Skip | Skips the Thank You page and redirects to the "Thank You Page Link" |
- For more information about the Thank you page Special Properties, read Thank you page Special Properties.
-
Other Special Properties for email surveys If you’re considering sending surveys from your own email domain and would like to update the from name, from address, and/or the reply-to email address dynamically, send a note to our Customer Concierge team and we’ll provide you with the Special Property details to do so!