Gorgias Integration
In this article:
FAQs
- Can I create a ticket in Gorgias based on a response being received?
- Can I change what events trigger a survey send?
- How can I change the question type I'm using to either CSAT or CES?
- What code should I copy for the request body?
Suggested next article: Core Training & Certification
Gorgias integration overview
Delighted’s Gorgias integration will automatically trigger email surveys (ex. CSAT surveys) following events you define in Gorgias.

Setting up the Gorgias integration
- 1
-
Encode your API key.
- Grab your API key in Delighted
- Go to https://coding.tools/base64-encode
- Input your API key in the top field
- Click Base64 encode
- Take the output and add the word “Basic” to the start. Should look similar to: “Basic ABCo23434fjewf9iw”
- Save this - you’ll need it for later!
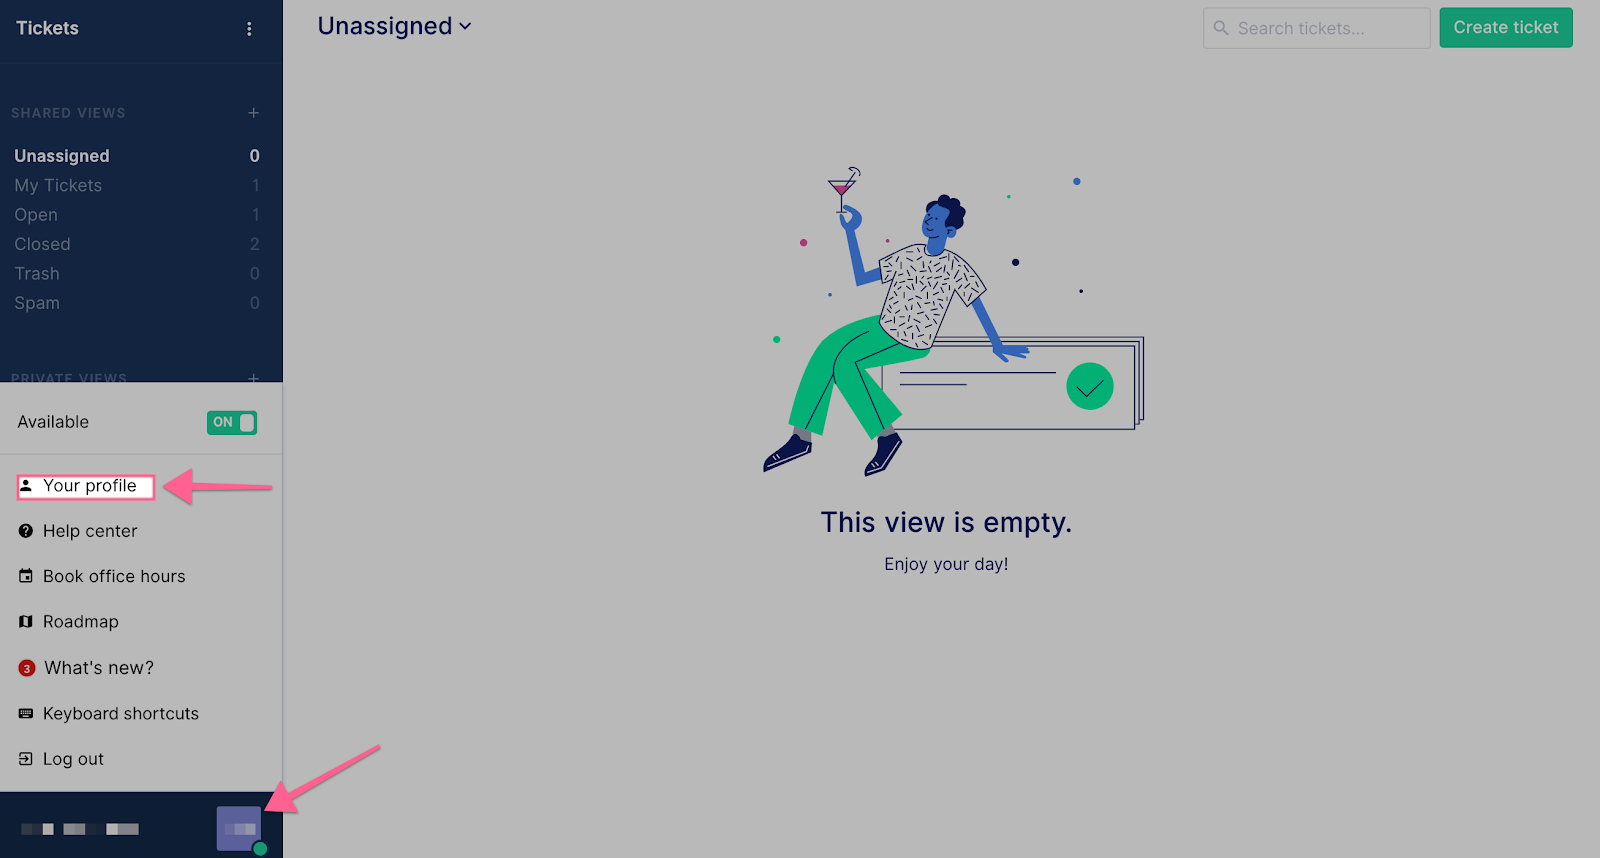
- 2
- Open the Profile View in Gorgias.
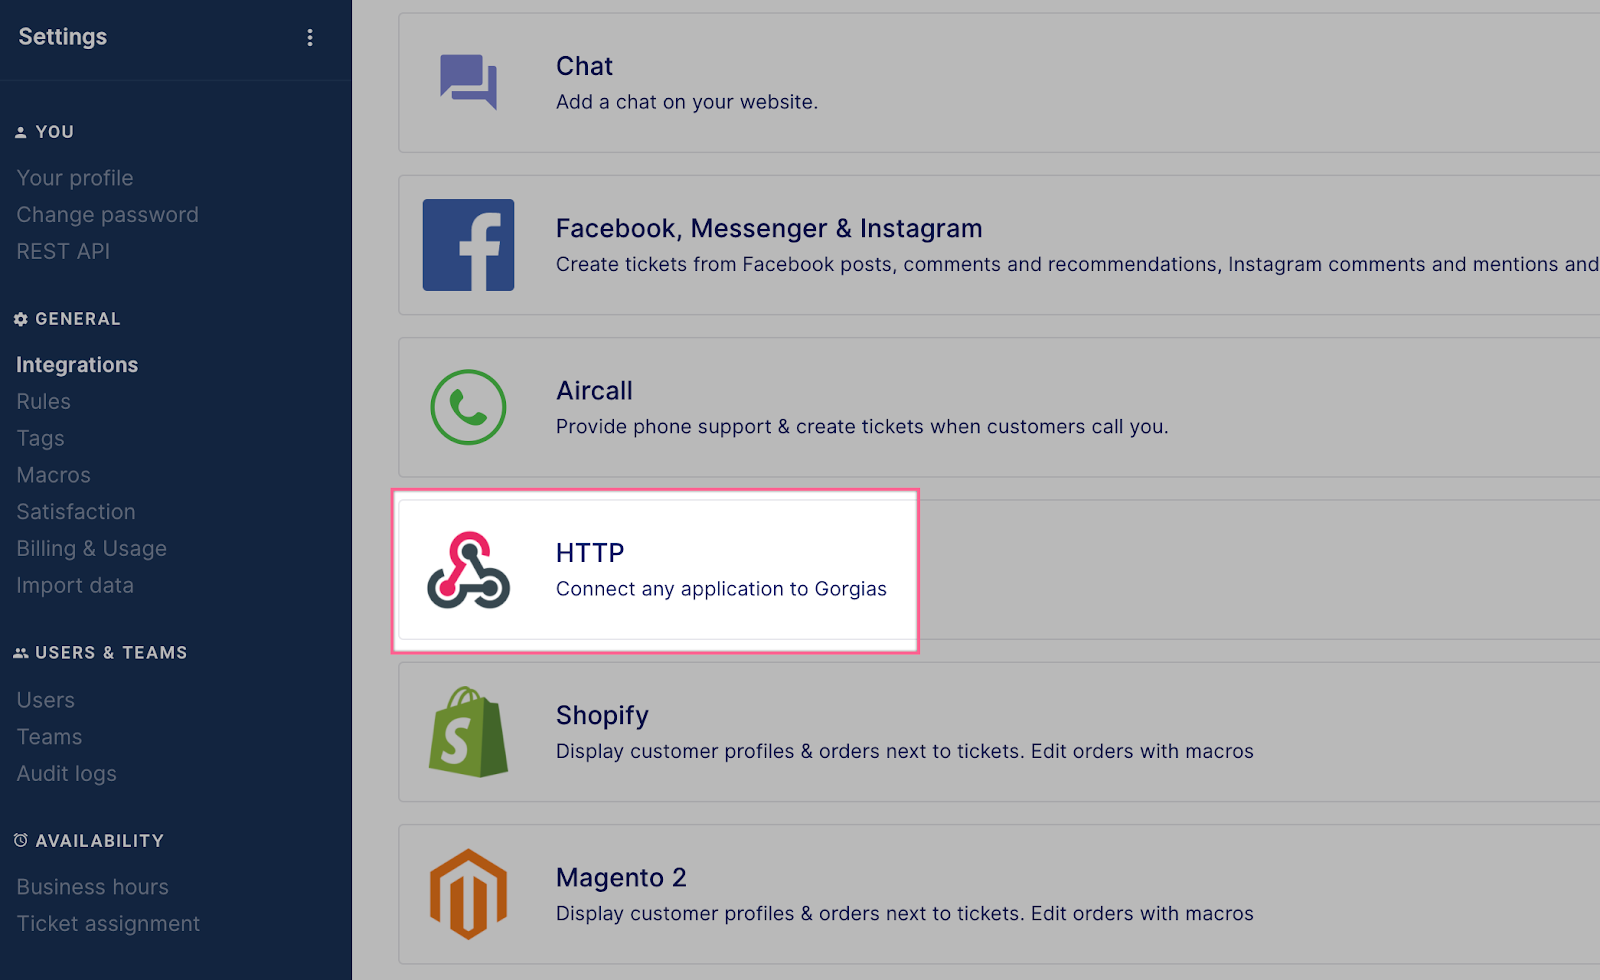
- 3
- Click on Integrations.
- 4
- Select HTTP.
- 5
- Click on “Add HTTP Integration.”
- 6
-
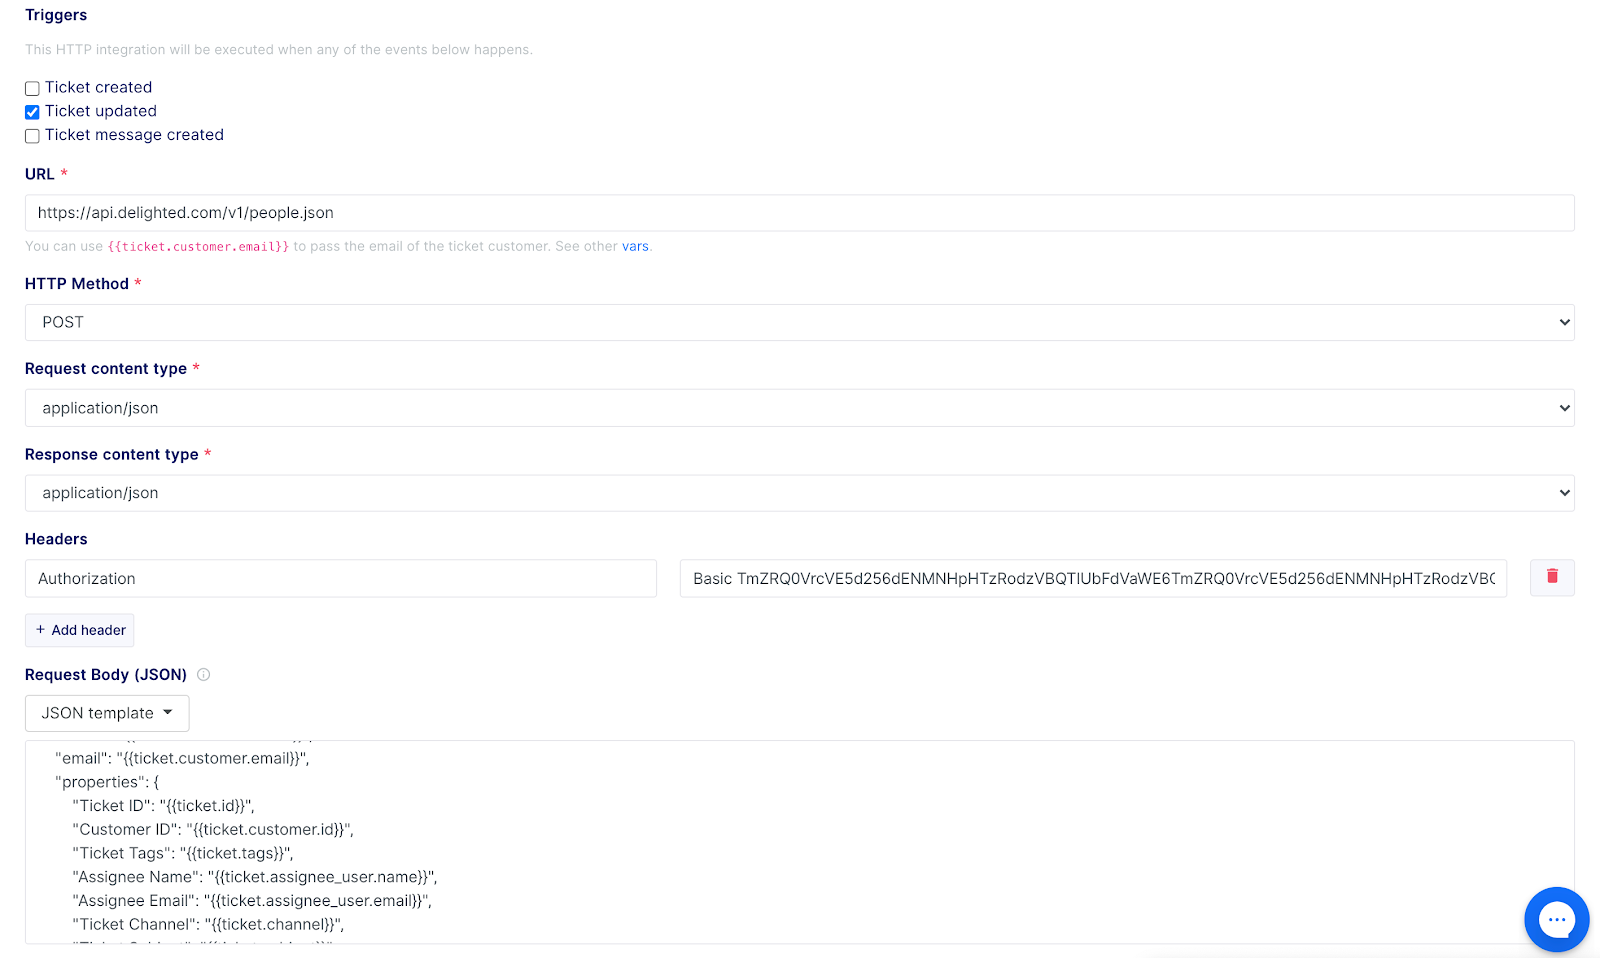
Input HTTP Details.
- Integration name: Delighted Survey Trigger
- Description: Triggering Delighted surveys
- Triggers: Ticket updated
- URL: https://api.delighted.com/v1/people.json
- HTTP Method: POST
- Request content type: application/json
- Response content type: application/json
- Headers:
- Click + Add Header
- Left-hand field: Input Authorization
- Right-hand field: Input your code from Step 1 above from the encoder (should look like "Basic Abcv123oijf...")
- Request Body (JSON): Copy and paste the code from this link
- 7
- Save changes.


Can I create a ticket in Gorgias based on a response being received?
Yes. Contact the Customer Concierge team for full details (Note: This requires use of Zapier and a premium feature - Webhooks - within the Zapier platform).
Can I change what events trigger a survey send?
Yes. In Step 6 mentioned above, you can set other conditions for your Gorgias trigger.
The above method requires an active Zapier license.
How can I change the question type I'm using to either CSAT or CES?
Interested in using another question type (ex. CSAT, CES, etc.) for your post-support surveys? Set up a new project to get started! Learn more via our projects overview resource.
What code should I copy for the request body?
Click through the Github link shared above for the full code, or copy directly from the code below:
{

"name": "{{ticket.customer.name}}",

"email": "{{ticket.customer.email}}",

"delay": "86400",

"properties": {

"Ticket ID": "{{ticket.id}}",

"Customer ID": "{{ticket.customer.id}}",

"Ticket Tags": "{{ticket.tags}}",

"Assignee Name": "{{ticket.assignee_user.name}}",

"Assignee Email": "{{ticket.assignee_user.email}}",

"Ticket Channel": "{{ticket.channel}}",

"Ticket Subject": "{{ticket.subject}}",

"Ticket Created Time": "{{ticket.created_datetime}}"

}

}