One-time Sends
In this article:
- How One-time sends work.
- Launching One-time sends.
- Canceling a scheduled survey.
- Preparing your CSV or Excel file in advance.
Suggested next article: Autopilot Sends
How One-time sends work
With One-time sends, just type or paste your target email addresses into your Delighted projects — or simply import a batch of people in a CSV or Excel spreadsheet — and then send your survey!

You can send immediately — or schedule your send for a time in the future. (The rule of thumb is that mornings, Monday through Friday, trend toward higher response rates.) One-time sends don’t recur automatically, like Autopilot Sends do, so you'll need to repeat the process for each One-time send.
Your projects will use the customization settings in your account at the time of the send.
-
About Throttling Worried about over-surveying your respondents? Don't be! Our throttling feature will prevent surveys from being sent if the respondent has already seen a survey from this project within your throttle period.
Launching One-time sends
To launch a One-time send immediately, or at a scheduled time:
- 1
- Access the One-time survey page
-
Click "Edit and send" on your Dashboard → select "Edit and send" under the Email or SMS platform → and click the "One-time survey" tab. (See the GIF in step 2)
-
- 2
- Enter your list of people
- Upload your CSV or Excel file with the list of the people to be surveyed → or type / paste in your email addresses by hand → and click “Next: Review" before sending
-

-
Include an "Email" column in your CSV file At a minimum, CSV or Excel file uploads to any CX project requires the word "Email" at the top of the column containing your respondent's email addresses. ( Click here to learn more.)

- 3
- Review your list and send
- Confirm your list → then choose “Send to [x] people now” as indicated in the GIF in step 2 above
- 4
- Optional: Schedule your send for a later time
- To schedule your send, pick "Schedule for sending later" → confirm the date, time, and time zone for your send, and click "Schedule sending to [x] people"
-


Canceling a scheduled send
If you want to cancel a CX survey send that you've previously scheduled, you can do so at any time before the surveys go out!
Also, if you'd like to change a scheduled send, simply cancel it first and follow the scheduling instructions above in step 4 to re-schedule the survey.
To cancel a scheduled send:
- 1
- Click "Edit and send"
- 2
-
Click "Edit and send" → under the Email or SMS platform (where you scheduled your survey)
- 3
- Click the One-time survey tab → and choose "Change/cancel" next to the "You have [x] one-time send(s)"
- 4
- Click "Cancel send" next to the scheduled survey you'd like to cancel → and select "Undo" from the banner if you've made a mistake
-


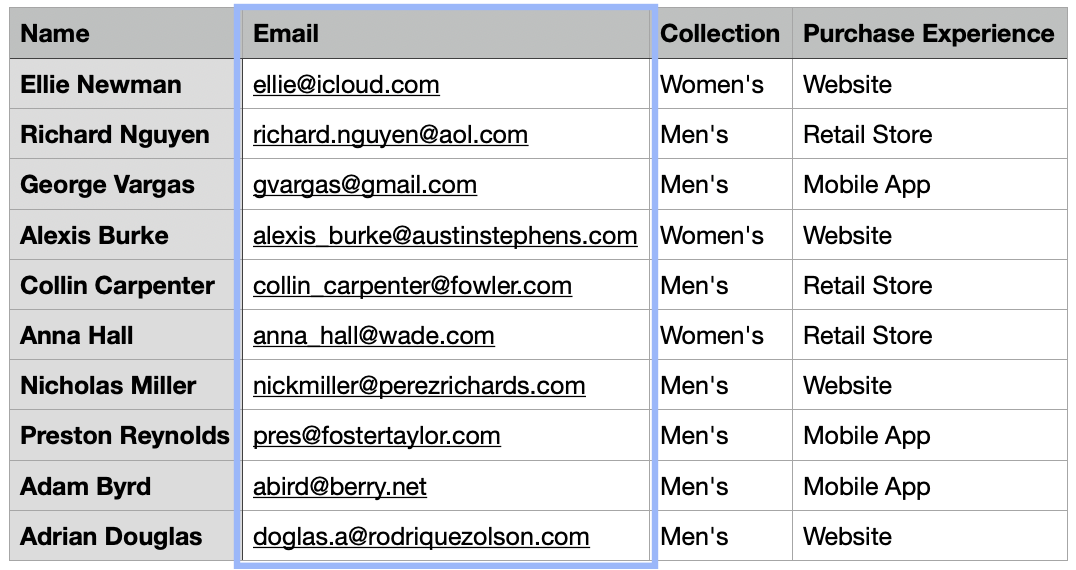
Preparing your CSV or Excel file in advance
Uploading your list of people in a CSV or Excel spreadsheet will prove convenient, giving you precise control over your recipients over time.
-
What's a CSV file?
CSV is short for Comma Separated Values, and is a common spreadsheet format that can be read by every major spreadsheet app, including Excel, Google Sheets, and Numbers.
The same CSV or Excel file can be used to for Autopilot controlled sends, if you decide to quickly automate your sending in the future.
To prepare your CSV or Excel file:
- 1
- At a minimum, enter each person’s email address → under a column labeled "Email"
-
- Note: Phone numbers should appear under a column labeled "Phone Number"
- 2
- Optional: Enter the names of your people in a column called "Name"
- 3
- Optional: Include any properties (ex. "Collection" and "Purchase Experience") that will be helpful when segmenting your results down the road
-
Delighted removes duplicate email addresses
As a CSV or Excel file is uploaded to Delighted, we'll automatically remove any rows with duplicate emails, only processing the first instance of each email per file.
